True Metrix Glucometer Manual: A Comprehensive Guide
This manual provides detailed instructions for the TRUE METRIX self-monitoring blood glucose system, ensuring accurate testing and confident management of your health.
It’s designed for quick reference and comprehensive understanding.
The TRUE METRIX system, developed by Nipro Diagnostics, Inc., is a reliable and user-friendly tool for self-monitoring blood glucose levels. Designed for individuals managing diabetes, this system empowers you with quick and accurate readings, facilitating informed healthcare decisions. Accuracy is central to the TRUE METRIX philosophy, driven by scientific research and technological advancements.
This system isn’t merely a meter; it’s a comprehensive solution for blood glucose management. The TRUE METRIX meter, coupled with its dedicated test strips, provides results from fingertip or forearm samples. It boasts a substantial memory capacity, storing up to 500 results complete with date and time for detailed tracking of your glucose trends.
Important Note: Never compare your TRUE METRIX meter readings with results from other meters. This system is designed to stand alone in providing reliable data. Always refer to the detailed instructions within the TRUE METRIX Owners Booklet for complete guidance.
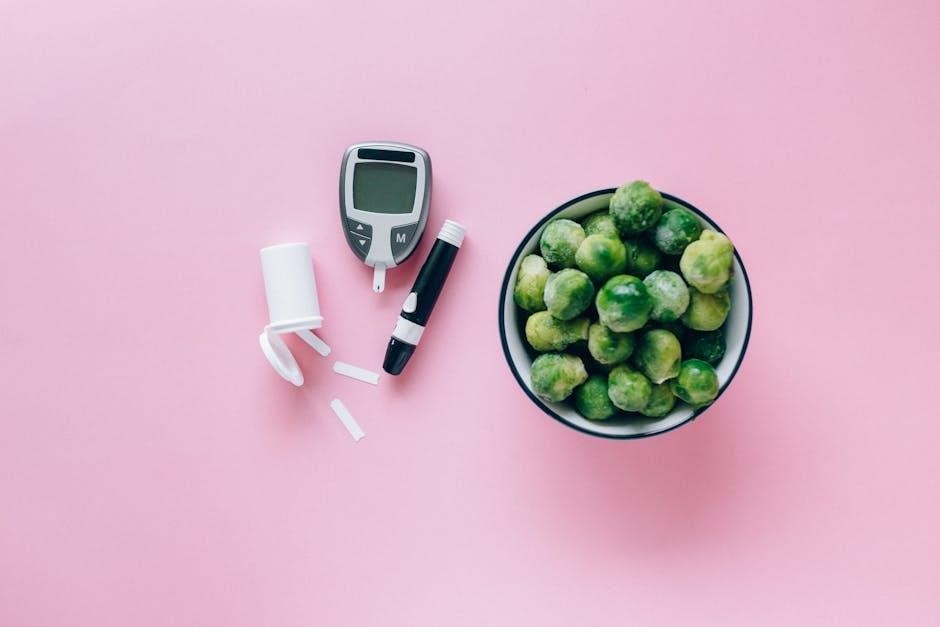
Understanding the Components
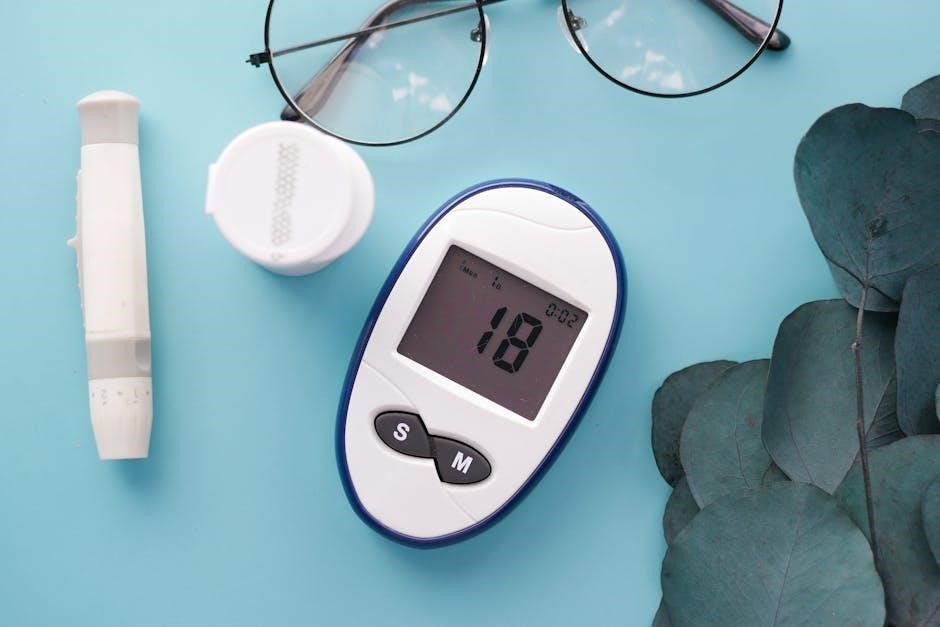
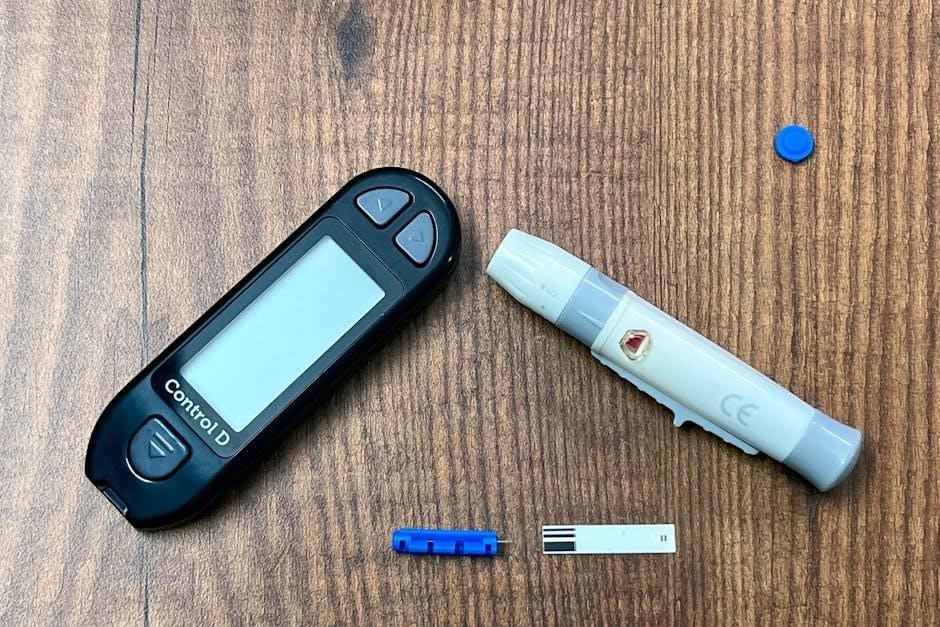
The TRUE METRIX system comprises several key components working in harmony to deliver accurate blood glucose readings. Primarily, you’ll have the TRUE METRIX meter itself, the central unit for processing and displaying results. Alongside this are TRUE METRIX test strips, specifically designed for use with the meter – never use strips from other brands.
A lancing device is included to obtain a small blood sample, typically from a fingertip or forearm. Lancets, the small needles used within the lancing device, are also essential. The system may also include a control solution for verifying meter and strip functionality.
The TRUE METRIX GO System requires storage in a dry place, maintaining a temperature between 40°F and 86°F, with relative humidity between 10-80%. Avoid immersing the meter or test strips in any liquids, and ensure the test port remains dry. Familiarizing yourself with each component is crucial for proper operation and reliable results.
Setting Up Your True Metrix Meter
Before performing your first blood glucose test, proper meter setup is essential. Initially, insert batteries into the designated compartment, ensuring correct polarity. The meter will likely power on automatically. To set the date and time – crucial for accurate data tracking – press and hold the button for approximately 10 seconds to enter Setup mode.
Within Setup mode, navigate using the meter’s buttons (refer to the ‘Meter Display and Buttons Explained’ section for specifics) to adjust the year, month, day, hour, and minute. Confirm each setting by pressing the appropriate button.
It’s also advisable to perform a control solution test to verify the meter and test strips are functioning correctly. Detailed instructions for control solution testing are found in the TRUE METRIX Owners Booklet. Proper setup ensures reliable readings and accurate record-keeping.
Meter Display and Buttons Explained
The True Metrix meter features a clear, easy-to-read display. The primary area shows your blood glucose result in milligrams per deciliter (mg/dL). Additional icons indicate the status of the test strip, battery level, and any error messages. Familiarize yourself with these indicators for optimal use.
Typically, the meter has at least two buttons. One button usually powers the meter on/off and starts/stops testing. The other button is used for navigating menus, setting the date and time, and recalling memory data. Pressing and holding this button for 10 seconds initiates Setup mode.
Refer to the detailed Owners Booklet for a comprehensive diagram of the display and a specific explanation of each button’s function. Understanding these controls is vital for accurate operation and interpreting your results effectively.
Performing a Blood Glucose Test: Step-by-Step
Before testing, ensure your hands are clean and dry. Wash with soap and water, then thoroughly dry them. Insert a TRUE METRIX test strip firmly into the test strip port on the meter – the meter should recognize the strip automatically.
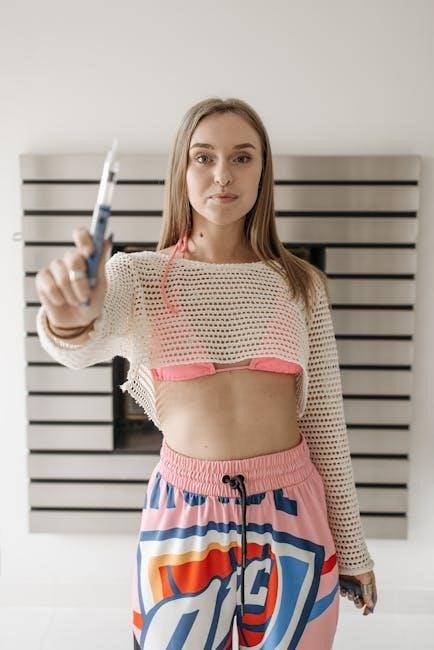
Prepare your lancing device with a fresh lancet. Select your fingertip or forearm as the testing site. Once ready, apply a small blood sample to the designated area on the test strip. Avoid smearing or applying too little blood; the strip will draw in the necessary amount.
The meter will begin analyzing the sample, displaying a countdown. Within seconds, your blood glucose result will appear on the screen. Record the result, noting the date and time for accurate tracking.
Inserting the Test Strip Correctly
Proper test strip insertion is crucial for accurate results. Locate the test strip port on your True Metrix meter; Ensure your hands are clean and dry before handling the test strip. Carefully remove a single test strip from the vial, avoiding touching the test area – the gold contact pad.
Insert the test strip into the port with the gold contact pad facing the meter. The strip should slide in easily; do not force it. The meter will typically power on automatically upon strip insertion, displaying a readiness symbol.
If the meter doesn’t recognize the strip, double-check the insertion direction and ensure the gold contact is clean and undamaged. A correctly inserted strip is essential for initiating the testing process and obtaining reliable blood glucose readings.

Applying the Blood Sample
After correctly inserting the test strip and confirming the meter is ready, gently lance your fingertip (or forearm, as advised by your healthcare provider) using a clean lancing device. Wipe away the first drop of blood with a clean, dry cloth – this drop may contain tissue fluid that could affect accuracy.
Gently squeeze or massage your finger to obtain a small, hanging drop of blood. Bring the blood drop to the designated sample area on the test strip. The strip will draw the blood in automatically through capillary action; do not smear or wipe the blood onto the strip.
Ensure sufficient blood is applied – an insufficient sample may result in an error message. Avoid applying excessive blood, as this won’t improve accuracy. The meter will begin the analysis process once enough blood is detected.
Reading and Interpreting Results
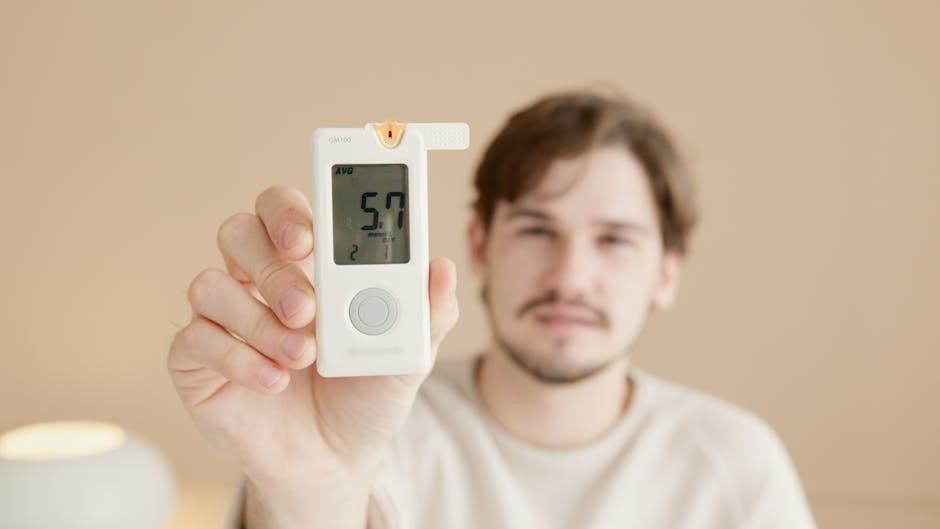
Once the blood sample is analyzed, your blood glucose result will be displayed clearly on the meter’s screen. The reading is presented in milligrams per deciliter (mg/dL). Refer to your healthcare provider for target blood glucose ranges specific to your individual needs and health condition.

Understanding your results is crucial for effective diabetes management. High readings may indicate a need to adjust diet, exercise, or medication, while low readings may require a quick source of glucose. Never self-treat based solely on meter readings; always consult your doctor.
The meter stores up to 500 results with date and time, allowing you to track trends and patterns. Regularly reviewing your testing history can provide valuable insights into how different factors affect your blood glucose levels. Remember accuracy is confidence!
Memory Function and Data Recall
The True Metrix meter boasts a substantial memory capacity, capable of storing up to 500 individual test results. Each result is automatically saved along with the corresponding date and time of the test, providing a detailed record of your blood glucose monitoring.
To access your stored data, utilize the meter’s recall function. Typically, this involves pressing and holding a specific button (refer to the ‘Meter Display and Buttons Explained’ section for details). The meter will then display your previous readings, often in chronological order – from most recent to oldest.
This feature is invaluable for identifying trends, understanding how food, exercise, and medication impact your glucose levels, and sharing comprehensive data with your healthcare provider. Consistent data recall supports informed diabetes management and personalized care.
Storing Test Results with Date and Time
A key feature of the True Metrix system is its automatic storage of blood glucose readings alongside the precise date and time they were taken. This functionality is crucial for tracking patterns and providing a comprehensive history to your healthcare professional.
Upon completing a test, the meter automatically saves the result, eliminating the need for manual logging. The internal clock ensures accurate time-stamping, vital for correlating readings with meals, activities, and medication schedules.
Maintaining an accurate date and time setting is essential for reliable data. If the time or date is incorrect, consult the ‘Setting Up Your True Metrix Meter’ section to learn how to reset it – typically involving holding a button for approximately ten seconds to enter setup mode.
Reviewing Your Testing History
The True Metrix meter conveniently stores up to 500 test results, each accompanied by the date and time of measurement. Accessing this history allows you to identify trends, understand how your body responds to different factors, and share valuable data with your doctor.
To review your testing history, navigate through the meter’s menu using the buttons. The specific steps may vary slightly depending on the model, but generally involve pressing the ‘Memory’ or similar button to recall past readings. You can typically scroll forward and backward through the stored results.
Regularly reviewing your data empowers you to actively participate in your diabetes management. Look for patterns related to meals, exercise, stress, or medication. This information can help you and your healthcare provider make informed decisions about your treatment plan.
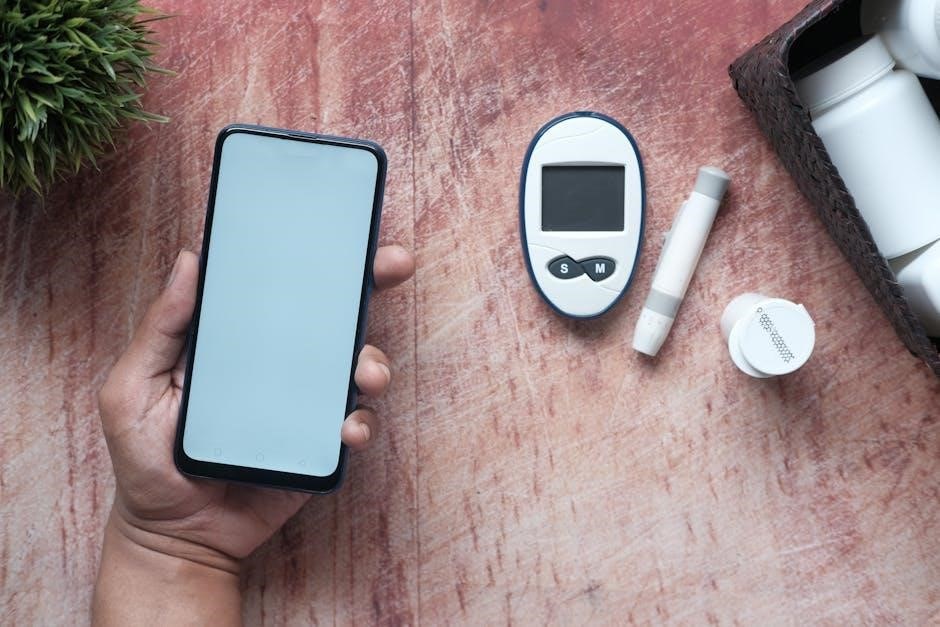
Downloading Data (If Applicable)
Certain True Metrix systems offer data downloading capabilities, allowing you to transfer your blood glucose readings to a computer or mobile device for more detailed analysis and record-keeping. This feature is particularly useful for sharing information with your healthcare provider and tracking long-term trends.
The process typically involves connecting the meter to a computer via a USB cable, or utilizing Bluetooth connectivity with a compatible smartphone app; Specific software or an app may be required, often available for download from the manufacturer’s website or app store.

Downloaded data can be viewed in graphical formats, allowing for easy identification of patterns and fluctuations in blood glucose levels. This detailed analysis can provide valuable insights into your diabetes management and help optimize your treatment plan. Refer to the specific model’s documentation for detailed instructions on data downloading.
Troubleshooting Common Issues
Encountering issues with your True Metrix meter is sometimes unavoidable. Common problems include error messages, inaccurate readings, or difficulty powering on the device. Always consult the full owner’s booklet for a complete list of error codes and their meanings.
If the meter displays an error, carefully note the code and refer to the manual for the corresponding solution. Inaccurate readings can often be traced to improper testing technique, expired test strips, or a dirty test port. Ensure strips are stored correctly and the meter is clean.
If the meter won’t power on, check the batteries and replace them if necessary. Never immerse the meter in liquids. If problems persist, contact Trividia Health customer support for assistance. Remember, never compare your meter to others.
Error Codes and Their Meanings
The True Metrix meter utilizes error codes to signal potential problems during operation. Understanding these codes is crucial for effective troubleshooting. While specific codes vary, common errors indicate issues like insufficient blood sample, improperly inserted test strip, or strip malfunction.
A code signaling an insufficient sample means you need to retest with a larger drop of blood. An improperly inserted strip requires careful re-insertion, ensuring it clicks into place. Strip malfunctions necessitate using a new test strip from a fresh, unopened vial.
Consult your True Metrix Owner’s Booklet (RF4TVH03r54) for a comprehensive list of all error codes and their detailed explanations. Ignoring error codes can lead to inaccurate results. Always address the issue before continuing testing to ensure reliable blood glucose monitoring.
Meter Accuracy and Calibration
The True Metrix system is engineered for high accuracy, driven by scientific research and technological advancements. However, maintaining accuracy requires proper use and understanding. The meter doesn’t typically require routine calibration by the user; it’s pre-calibrated at the factory.
Accuracy is influenced by factors like temperature, humidity, and proper testing technique. Ensure the meter and test strips are stored within the recommended range (40°F-86°F, 10-80% relative humidity). Avoid extreme conditions.
Never compare your True Metrix meter results with those from other meters, as methodologies differ. If you suspect inaccuracies, verify your technique, use fresh test strips, and consult your healthcare provider. The TRUE METRIX portfolio prioritizes confidence through reliable performance.
Proper Storage and Maintenance
To ensure the longevity and accurate functioning of your True Metrix system, proper storage and maintenance are crucial. Store the TRUE METRIX GO System in a dry place, protected from extreme temperatures and humidity – ideally between 40°F and 86°F (4°C and 30°C) with 10-80% relative humidity.
Never immerse the meter or test strips in any liquids. Avoid placing liquids onto the meter or into the test port. Clean the meter regularly with a soft, damp cloth. Avoid harsh chemicals or abrasive cleaners.
Keep the test port free from debris. Regularly check the expiration dates on your test strips and discard any expired strips. Proper care will help maintain the reliability and accuracy of your blood glucose monitoring.
Safety Precautions and Warnings
Always prioritize safety when using the True Metrix system. This device is intended for self-testing and should not replace professional medical advice. Never share your lancet device with others to prevent cross-contamination and the spread of bloodborne pathogens.
Never attempt to disassemble or modify the meter. This could compromise its accuracy and safety. If the meter appears damaged, discontinue use immediately. Keep all components out of reach of children.
Crucially, never compare results from your True Metrix meter to readings from other meters, as methodologies can vary. Avoid exposing the meter and test strips to extreme temperatures or humidity. Always follow proper disposal procedures for used test strips and lancets – treat them as biohazardous waste.
Cleaning the Meter and Test Port
Maintaining cleanliness is vital for accurate results and preventing infection. Before and after each use, gently wipe the exterior of the True Metrix meter with a slightly damp cloth. Avoid harsh chemicals or abrasive cleaners, as these can damage the device.
Specifically, the test port requires careful attention. If any blood or fluids enter the port, use a clean cloth dampened with water to carefully remove them. Ensure the port is completely dry before inserting a new test strip.
Always wash your hands thoroughly with soap and water before testing, and dry them completely. This prevents contamination of the meter and test strips. Do not immerse the meter or test strips in liquids. Regular cleaning contributes to the longevity and reliability of your True Metrix system.
Disposal of Used Test Strips and Lancets
Proper disposal of used test strips and lancets is crucial for safety and preventing accidental needle sticks. Used test strips should be treated as biohazardous waste and disposed of in a designated sharps container or a sturdy, puncture-resistant container with a secure lid.
Lancets, being sharp objects, always require disposal in an approved sharps container. Never throw loose lancets into the trash; Check with your local regulations regarding proper sharps container disposal options, such as collection sites or mail-back programs.
Do not recap, bend, or break used lancets, as this increases the risk of injury. Ensure the sharps container is clearly labeled and kept out of reach of children and pets. Responsible disposal protects both you and your community.
Comparing to Other Meters: Important Note
It is absolutely critical to understand that you should NEVER compare your True Metrix meter readings to results obtained from other blood glucose meters. Each meter utilizes unique technology and chemistry, leading to inherent variations in results, even when testing the same sample simultaneously.
These differences are normal and do not necessarily indicate an issue with your True Metrix meter. Factors like test strip formulation, meter calibration, and individual blood characteristics contribute to these variations. Relying on comparisons can cause unnecessary anxiety and potentially incorrect treatment decisions.
Focus solely on the readings provided by your True Metrix meter and follow your healthcare professional’s guidance based on those results. Consistent use of a single meter ensures reliable tracking of your blood glucose levels and effective diabetes management.